How we got the 'blogging' part of our blog up and running
Part 3 of the buildlog
In earlier posts, we have covered things like getting Laravel installed, and getting authentication setup. Now, it's time to add some real functionality, and content. For this, we will be using Statamic. Specifically, we are going to leverage the CMS features of Statamic, using it as our Blog backend, as well as using its awesome Antlers templates, along side Laravel's Blade syntax, to craft some really cool blog components.
Blogging, reporting on current events, and offering commentary on the technology landscape serve as a major driver of our organic traffic. This requires a couple things, mainly a website that is very easy to read / use, and content that people want to interact with.
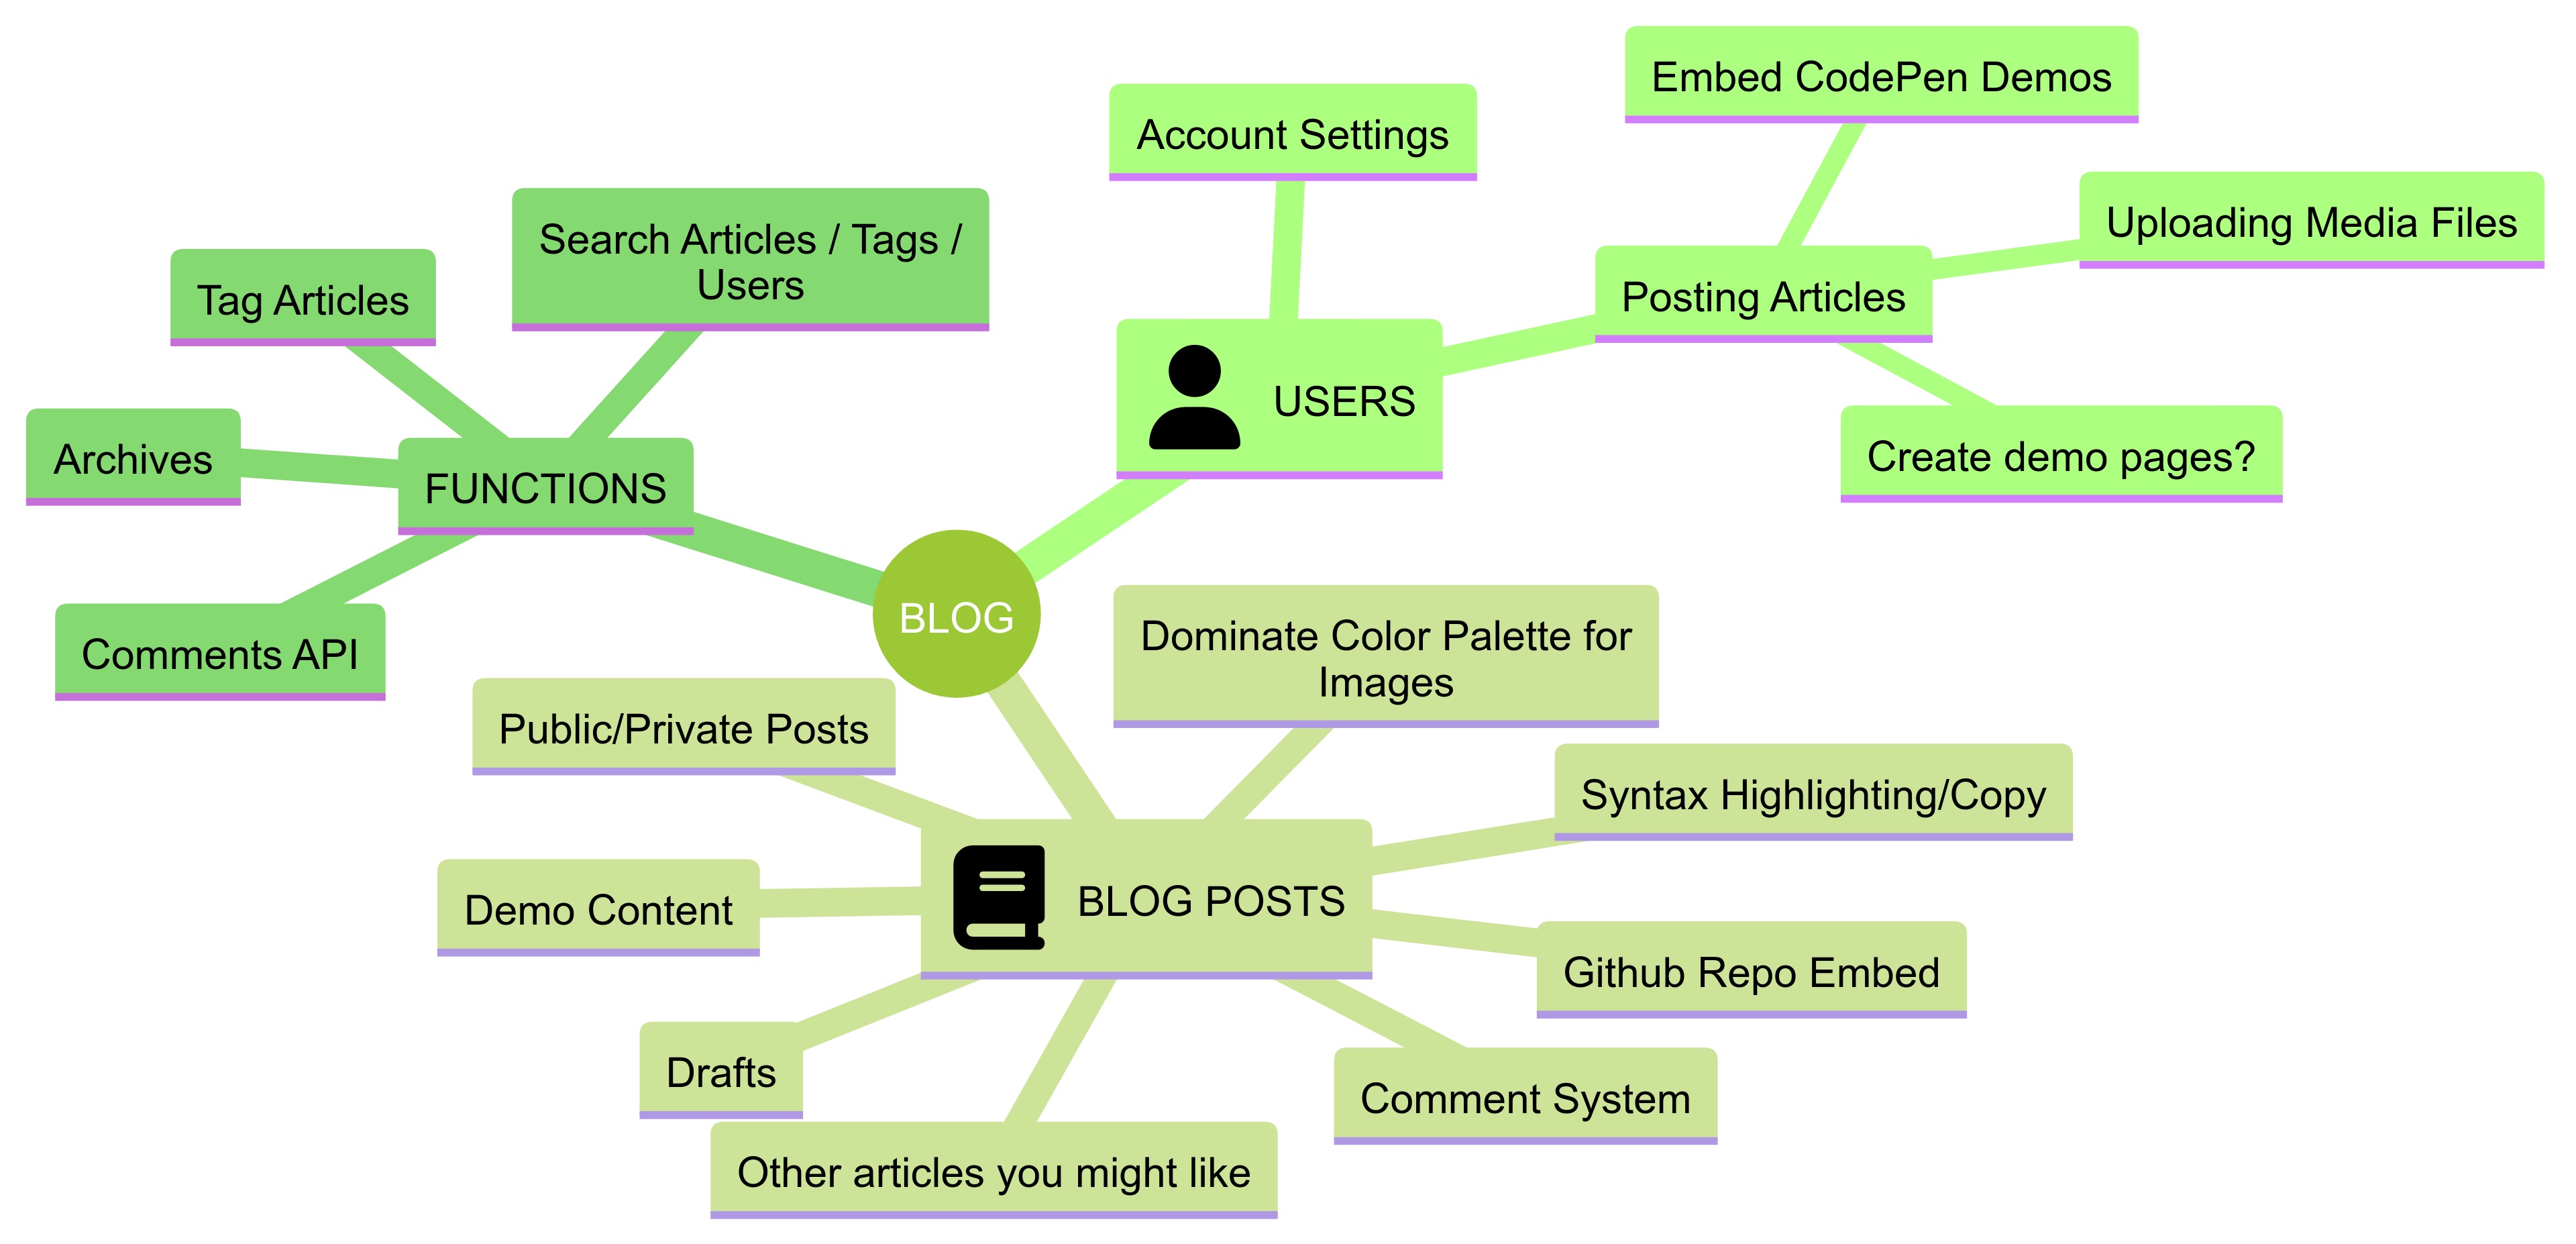
For these reasons it was also decided early on, that capturing the process of building the blog, could make for an interesting series of articles. Early on in the development process, nothing had been decided, no platforms, no languages, nothing. To get an idea of what we were trying to solve, a simple Mind Map was created.
Wordpress Drama
I don't want to waste time or derail this article before it even gets started, but at the time in the software world, a LOT of drama was going on over wordpress. Personally, I used to use Wordpress anytime I needed a blog, however, the drama had permanently soured me on the idea, and so a "Sage + Bedrock" theme that was partially built had already been scraped and we were back at step 1.
Reinvent the wheel
Not wanting to completely roll my own admin panel + CMS, I started looking around, I tried Binshops blog and a few other Laravel blogging options, and while Binshops was by far the best and most complete of the ones I tried, they still left quite a bit of work to do. At this point, thankfully, a voice of reason broke through and we took another look at CMS options. First I decided to start out with Strapi. I followed their getting started guide, and went through and created my first blog post, complete with featured image and additional tags. So far so good. However, after a bit, it really just wasnt what we wanted. Instead we decided to finally give Statamic a try.
Statamic FTW
If it wasnt for Statamic, you would not be reading the post right now. Not only because this site runs on Statamic, but because the site would have never gotten finished without it. A large, significant amount of time was saved by using the Statamic ecosystem and packages, almost all of them FREE packages btw.
If you are looking into getting statamic setup, it is HIGHLY encouraged that you head over to their site and consult to documentation. There are a few different ways to install and use statamic, and it is highly dependent on your application and codebase. For instance, you can use their antlers template language, and really go all in on Statamic, or with Version 5 (the newest version at time of writing), you can instead stick with your blade templates, and use the @antlers directive to inject statamic content where you need it. For us, this let us 'slip' the blog into our existing Laravel site with almost zero friction. Getting their content on our page was honestly incredibly simple, satisfying, and once you see the templates I think you'll agree, quite sexy.
Statamic Basics
Before we drop into some of the actual code, I want to make sure we are all on the same page when it comes to some of the terminology statamic uses. They are really big on a few things, 'Blueprints', 'Taxonomies', and 'Collections'.
Blueprints are config YAML files that explain how a particular item 'looks'. Does it have form fields, what are they etc etc. Taxonomies are basically the 'categories' that your Collections are connected to. The Collections are all your posts, for instance, I have a collection called Blog, and inside are all the, you guessed it, Blog Posts.
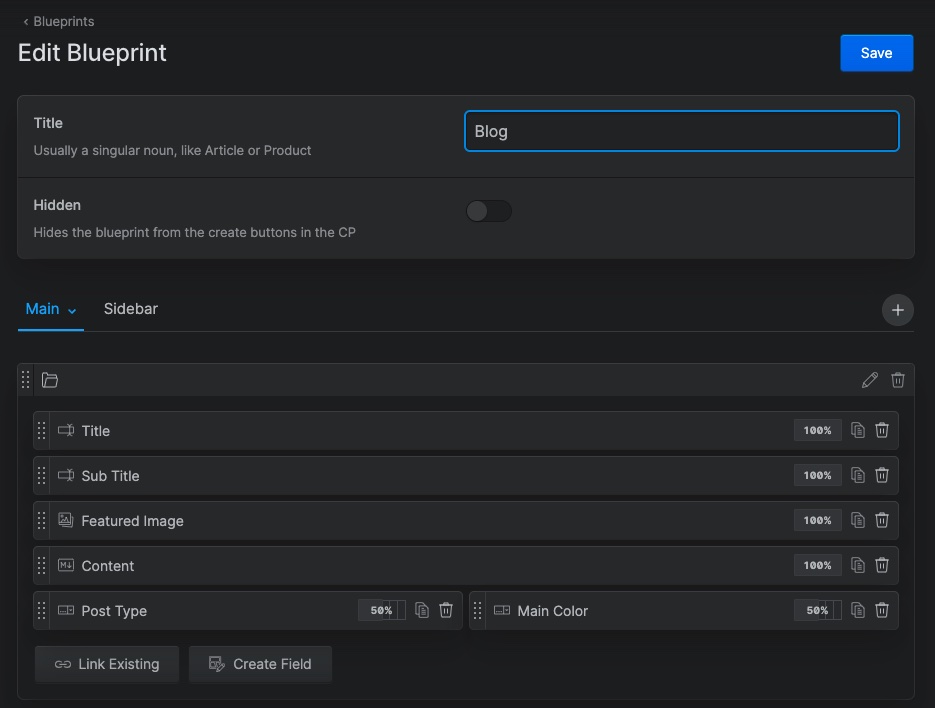
Here is a photo of how editing a blueprint via the Statamic control panel looks, but you can just as easily edit the .yaml file if your into that kinda stuff.
The other thing that can be configured is the backend storage for saving your Blueprints, Collections etc. Typically Statamic uses a flat file storage. So you have a folder in your Laravel app called collections and inside are a bunch of markdown files. This keeps all of your blog content inside your repository and version controlled. That can be a good or bad thing, for some people you might want your articles stored in a more traditional database. Its my advice that if you think you might want this, get it done right away. We chose to store our articles in the database, as it allows using the Laravel ORM to interact with the models alot easier than if they were in a flat file.
Control Panel
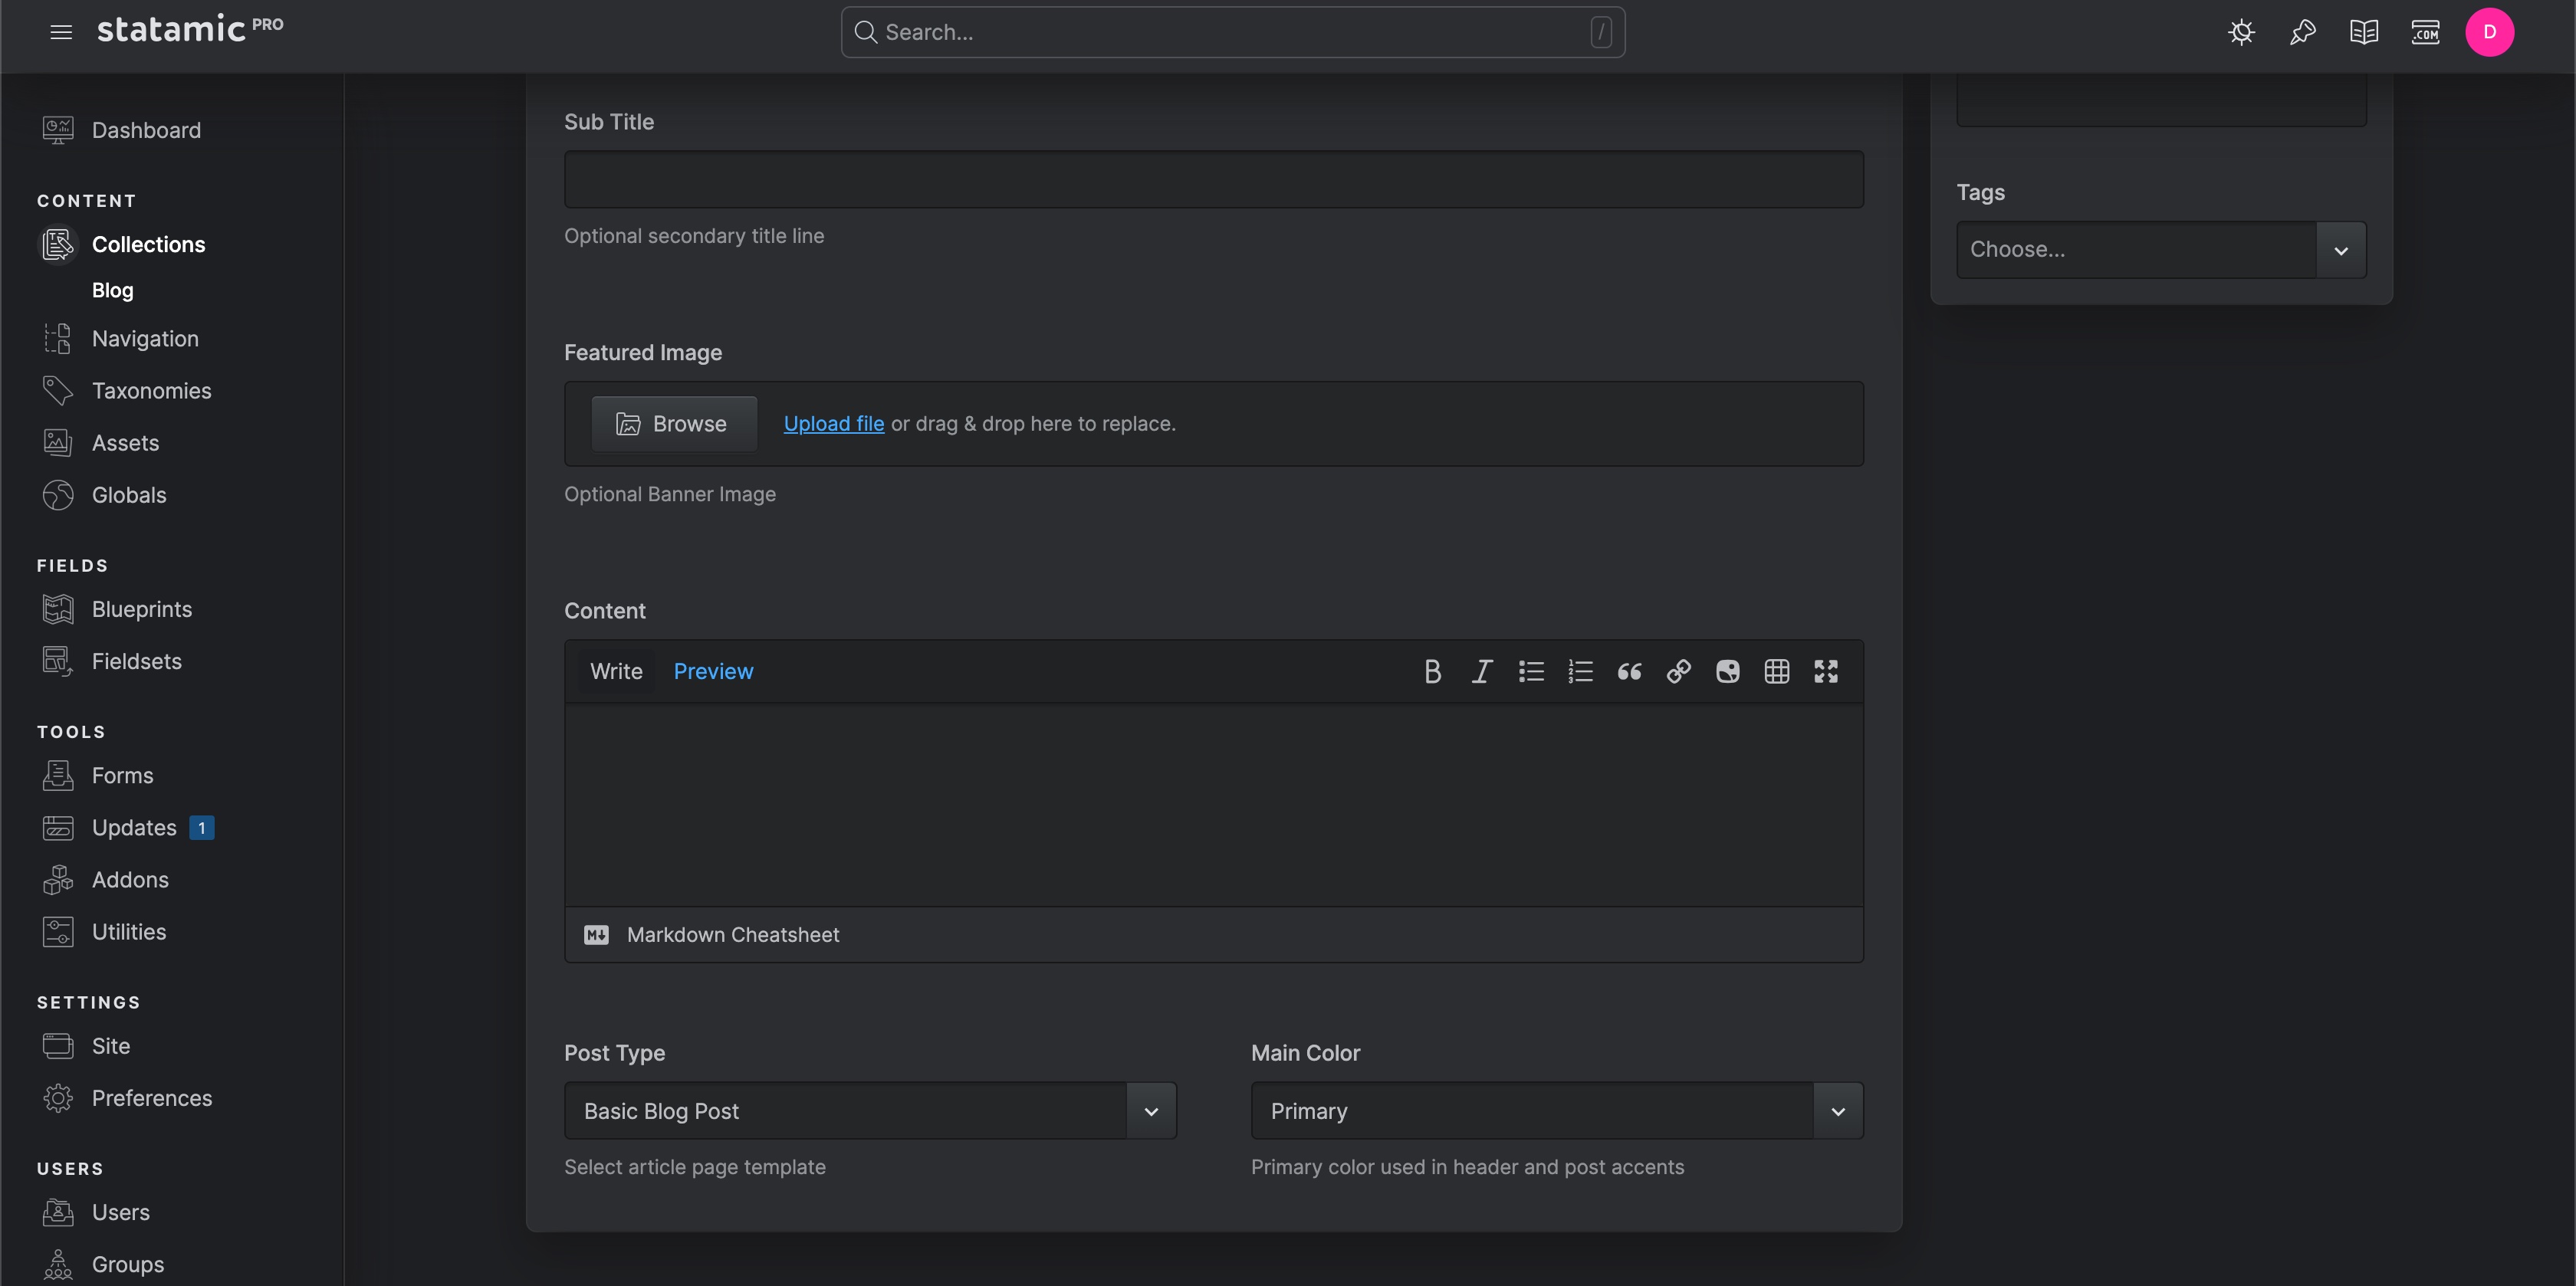
Just checkout this drop dead gorgeous admin interface for creating a post. Your blueprint controls what fields end up where and its honestly super easy to get your dream post builder setup. Comparing this to something like Wordpress Gutenberg block editor isnt even fair. The usability of this stomps all over Wordpress.
Statamic Templates
As alluded to earlier, the code for these templates is quite nice. If you are looking to put a list of posts on a page, the fetching of the posts, and the displaying, are all done at the same time, there is no need for a controller to grab them from a model and pass it on to the view, instead Statamic handles a lot of that for you. In a .blade.php template, using their directive, you get your posts with something like this
@antlers
  {{ collection:articles }}
    {{ title }}
  {{ /collection:articles }}
@endantlers
What about if you wanted to create a navigation element for your categories (taxonomies). Well for that we can use instead of the collection element, we instead use taxonomy (there is also a nav tag that is super helpful as well).
<nav class="nav nav-underline justify-content-between">
 @antlers
 {{ taxonomy:a_o_i sort="title" }}
	<h2 class="nav-item nav-link"><a href="{{ url }}">{{ title | title }}</a></h2>
 {{ /taxonomy:a_o_i }}
 @endantlers
</nav>
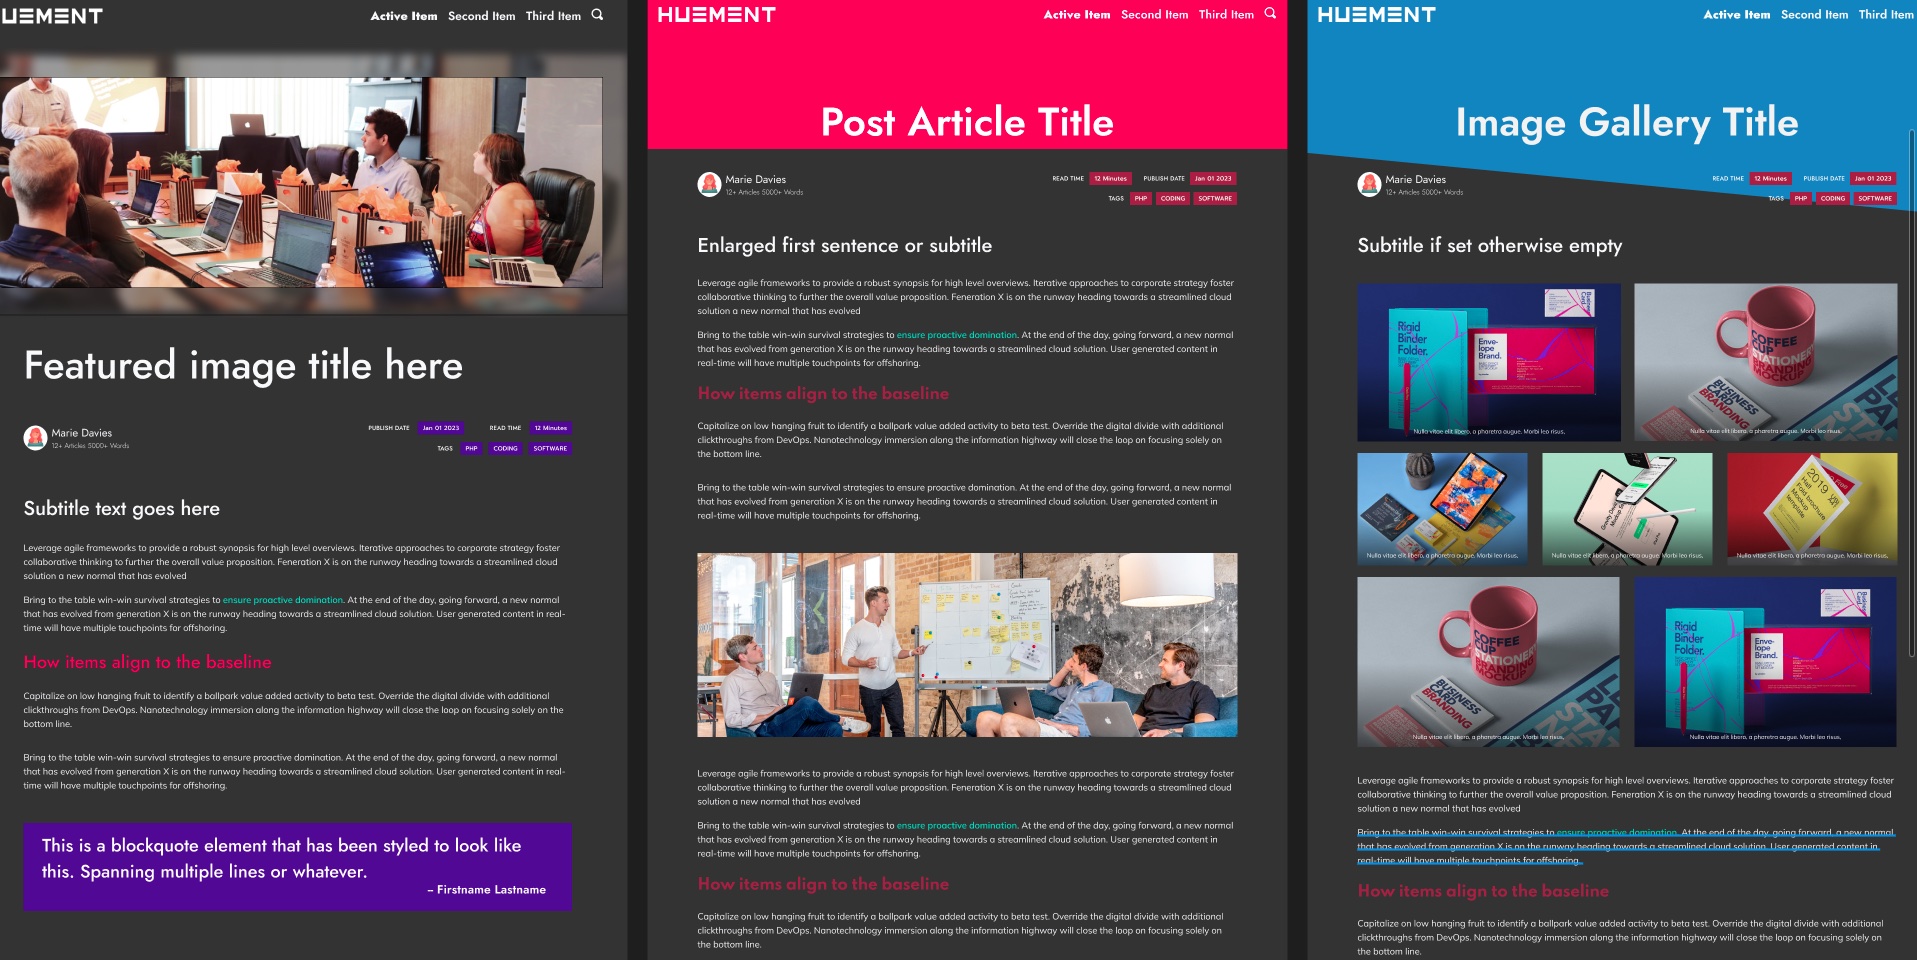
Honestly I was blown away by how much fun I was having building this blog, and by how easy it was. Checkout this early picture, and compare it to the finished product, you can see how far we've come.
Summation
There is a lot more to say about Statamic, and building the Huement website, however for now I hope this article has given you a good idea of what is possible by using Statamic and how easy it is to use. In the next article we will dive deeper into using components, blade specific directives and more. Cool stuff like building a related posts widget. Here is a sneak preview.
<section class="section blog-post-related-posts mt-5">
  <div class="container">
    <div class="row">
      <s:partial:blog/related_posts :id="$post['id']" />
    </div>
  </div>
</section>
If there is something you think was missed in this article, or anything you would like to add please leave a comment below, and we hope you will come back for the next article in the series.


Comments
Add Comment
All Comments
// NO_COMMENTS_IN_BUFFER
Establish initialization protocol by creating the baseline entry trace.
System Moderation Interceptor is ON for this communication hub. All user transmission vectors must clear access protocol filtration approvals before broadcasting logs live to public network arrays.