
Part 1 of our ongoing Laravel Series
Hello and welcome to the first post in our Laravel Series. This posts aim, obviously going by the title, is to go over getting started using Laravel with Bootstrap. It is also going to cover a few other helpful getting started tips that apply to Laravel in general. It is not an all encompassing tutorial, rather it is more of a primer that will give you an easier time getting started and accomplishing more complex tasks, such as adding a blog or a dashboard.
If you're totally unaware, the defaults right now for Laravel Breeze (one of the best login / user profile packages) is to install Tailwind CSS. However, with only a couple commands, you can swap out Tailwind for Bootstrap 5. While your reasons are you own, for me, if I am building a regular website, that doesn't have 'application' features, like a dashboard, or inbox or something, I like to use Bootstrap for its simplicity and succicientness. Regardless of the reason for the season, if you're going to go Bootstrap, this is how to go about it.
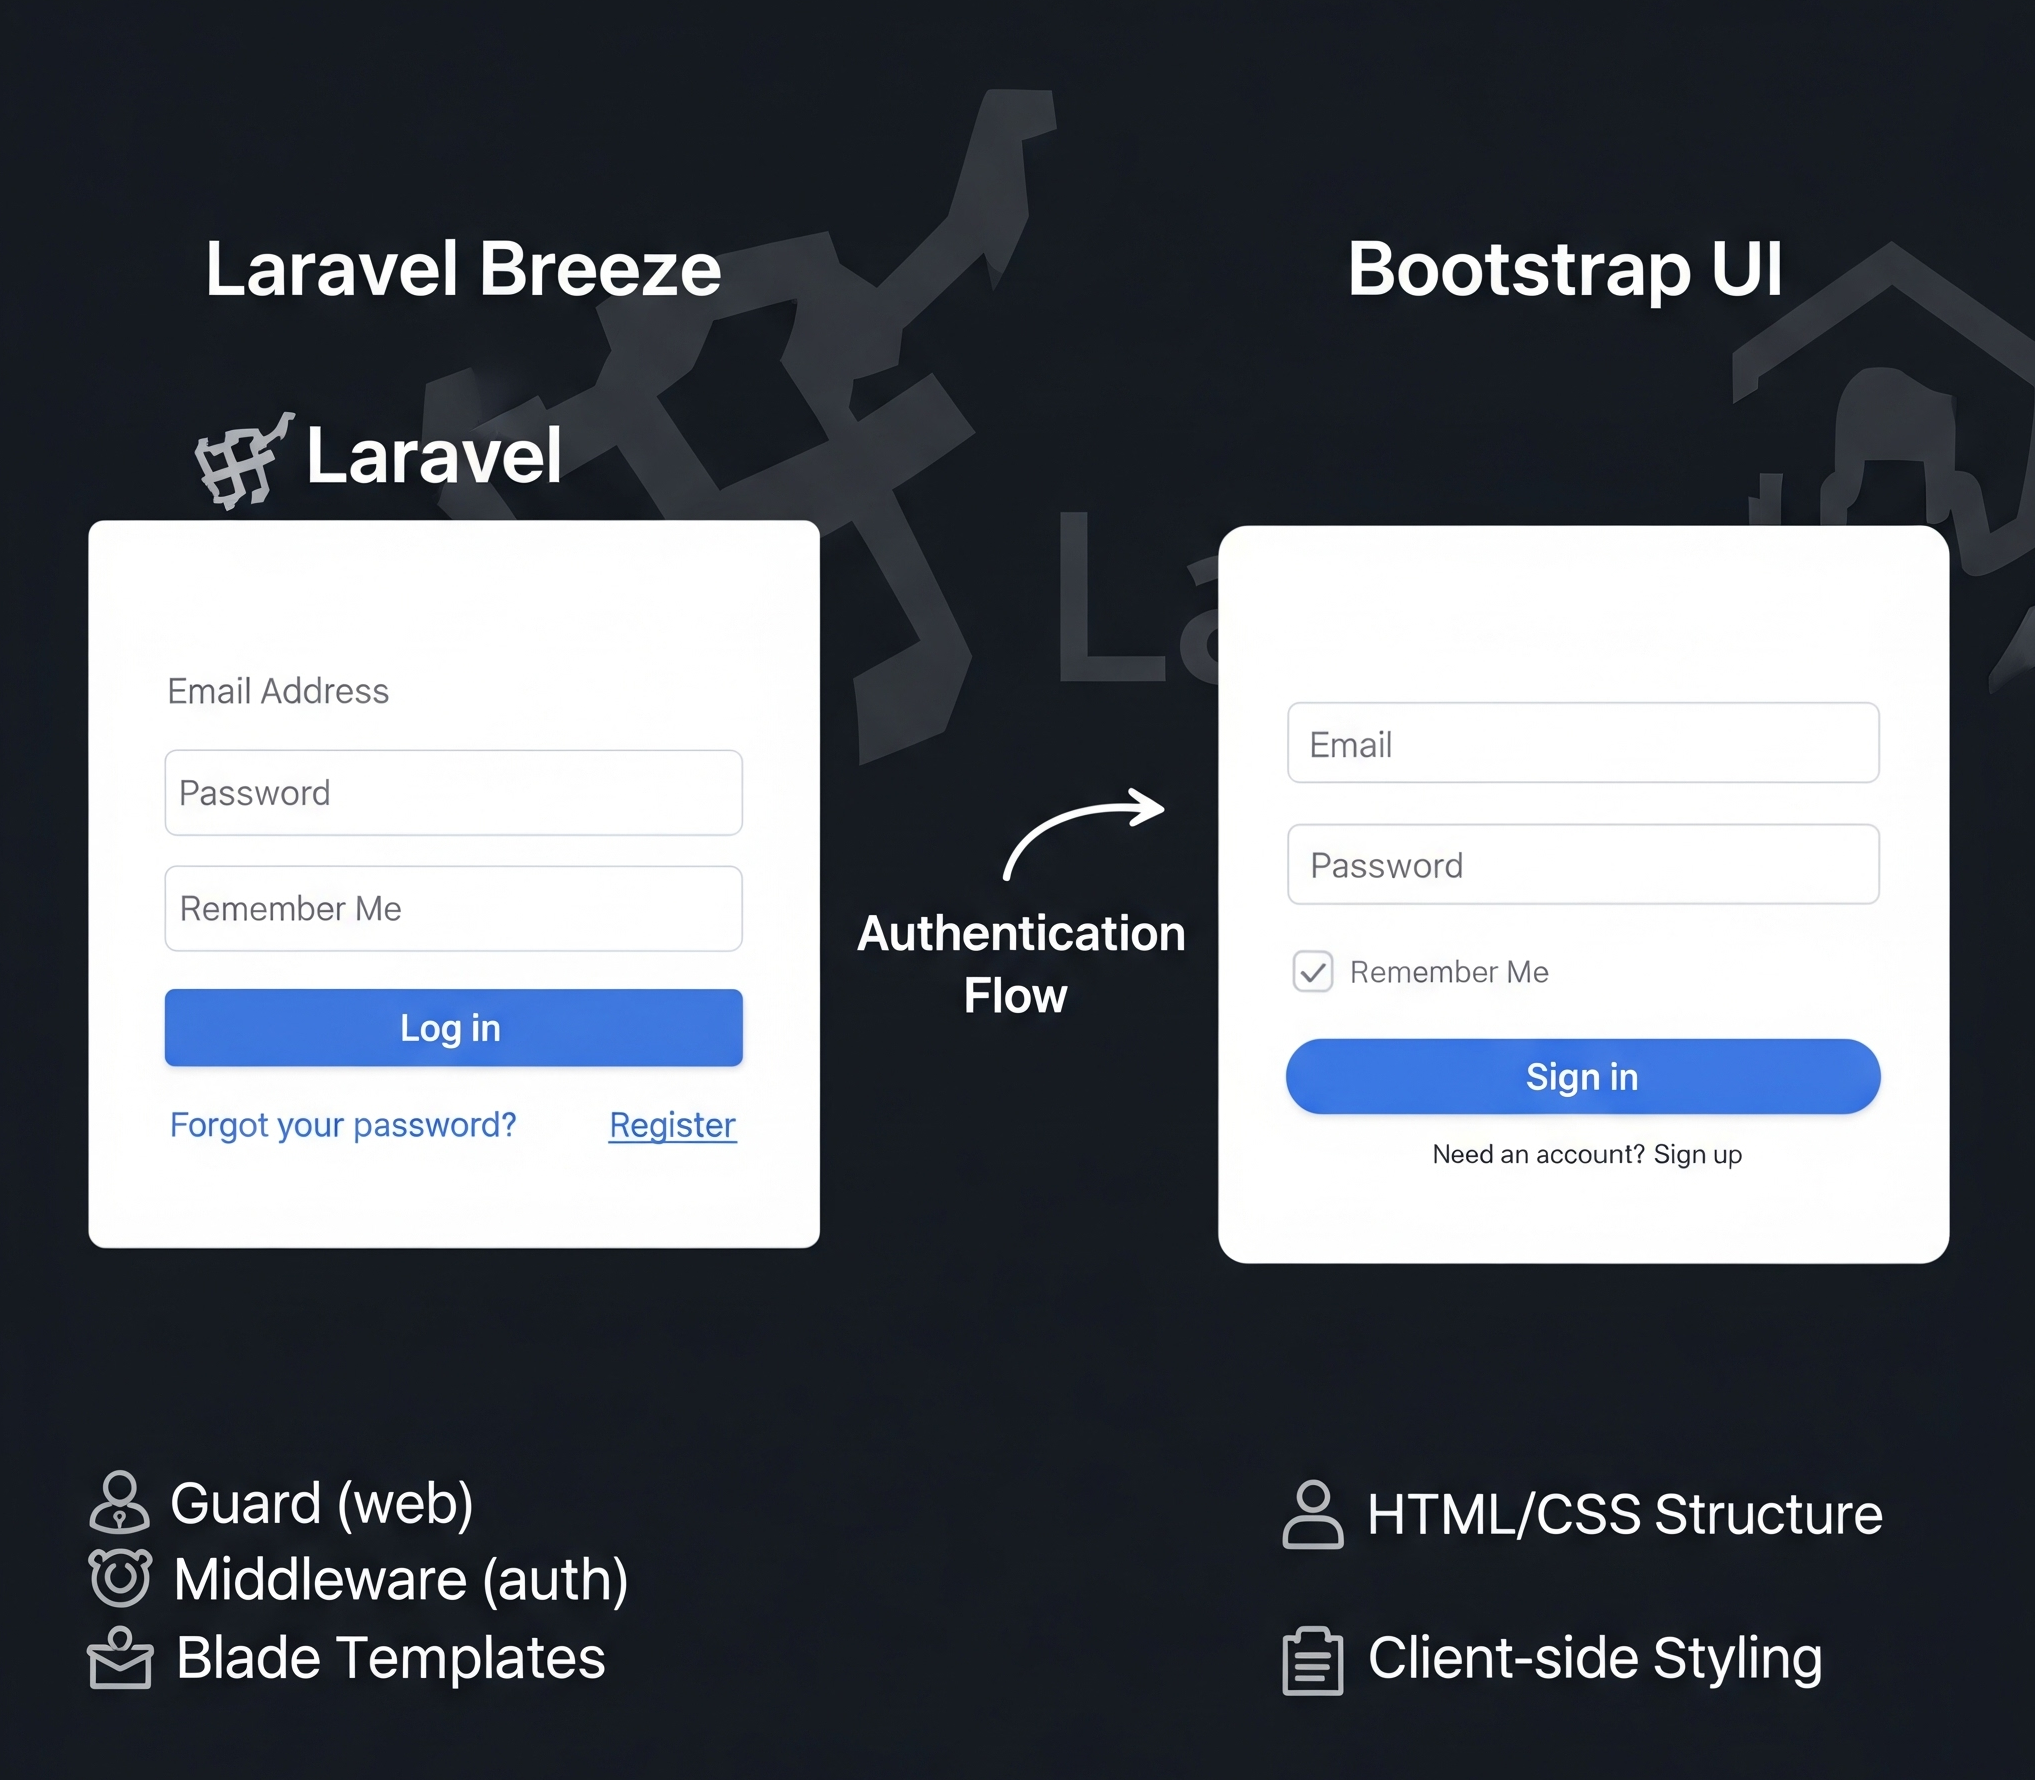
CAPTION: Bootstrap Markup used to render the traditional Auth forms
Prerequisites
Before we dive in, ensure you have the following installed:
- PHP (version 8.2 or higher)
- Composer (latest version)
- Node.js and npm (for front-end assets)
- MySQL or another supported database
- A terminal (e.g., Command Prompt, Bash, or PowerShell)
Ready? Let’s get started!
1: Install Laravel
First, create a new Laravel project using Composer. Open your terminal and run:
composer create-project laravel/laravel breeze-app
This command creates a new Laravel project named breeze-app. Replace breeze-app with your preferred project name.
Navigate to the project directory and get to work setting up the .env file:
cd breeze-app
cp .env.example .env
php artisan key:generate
nano .env # edit your DB data, APP_URL etc etc.
Pretty standard so far, at this point, you should have a nice shiny new welcome page. At this point, it's time to get your user accounts setup. For this, it is a regular breeze install, but then we are going to add an extra package, guizoxxv/laravel-breeze-bootstrap: A Laravel package to use Bootstrap scaffolding with Breeze.. By using this, we will have templates configured to use Bootstrap instead.
composer require laravel/breeze --dev
php artisan breeze:install
Which Breeze stack would you like to install?
[0] Blade
[1] Blade with Alpine.js
[2] Livewire
[3] Inertia (Vue)
[4] Inertia (React)
[5] API
> 0
composer require guizoxxv/laravel-breeze-bootstrap --dev
php artisan breeze-bootstrap:install
php artisan migrate
2: JS/CSS Assets
Now that you have the backend portion setup, your User table should be present in your database, its time to setup the frontend and get your css working.
npm install
npm run dev
Common ViteJS Error & How to fix it.
What is when you start HMR (Hot Module Reload) and things get all messed up, your stylesheets dont seem like they are loading, and when you inspect the code you see something like this:
<link rel="stylesheet" href="http://[::1]:5174/resources/sass/app.scss" />
Yikes!!! What the hell is going on there right? If you search for that crazy string of http://[::1]:5174/ you'll see that it is an issue with your ViteJS configuration not being quite setup all the way. I personally had to go to the Laravel Discord for help.
In the end, this is what I recommend for your starter vite.config.js
import { defineConfig } from 'vite';
import laravel from 'laravel-vite-plugin';
import path from 'path'
export default defineConfig( {
server: {
host: '0.0.0.0',
hmr: { host: 'testsite.local' },
proxy: {
'/0.0.0.0': 'http://testsite.local'
}
},
resolve: {
alias: {
'~': path.resolve(__dirname, 'node_modules')
}
},
plugins: [
laravel({
input: [
'resources/sass/app.scss',
'resources/js/app.js',
],
refresh: true,
}),
],
});
Where we are at
Here is something like what you should be seeing.

Sidenote
Using the Discord Server
Time and time again, I have ran into problems and had to get help from the Discord server, and I can't thank everyone there enough for always being able to help out. If you are working on a Laravel project of any size, I would seriously recommend getting familiar with Discord, and joining the Laravel Discord Server. https://discord.com/invite/laravel
3: Components
This article is aimed at those starting out with Laravel. If you are just starting out with Laravel, one of the best things you can do is run through the Official Laravel Bootcamp. Specifically their 'Chirper' demo, that lets you create a basic CRUD posting application. Keeping with the Bootstrap theme of this article, if you do the regular Bootcamp Chirper, it also uses Tailwind. So I wanted to do a quick example of showing how you can either adapt existing Laravel Tailwind components, or create entirely new Bootstrap based Blade components.
When doing this, you might want to install a package to easily add some prebuilt components, or at the very least, check them out for some ideas. I really like and recommend this one: bastinald/laravel-bootstrap-components: Laravel Bootstrap Blade components.
Now, adapting Bootstrap to Bootcamp, is fun and easy! For example, turning back to Bootcamp and Chirper specifically. The Chirper index.blade.php page, the page that shows a list of all the saved 'Chirps' AND includes a form for creating new chirps (a pretty complex page), we can adapt it to use Bootstrap. The results might look something like this:
@extends('layouts.app')
@section('content')
<div class="container mt-3 pt-3">
<div class="row">
<div class="col">
<form method="POST" action="{{ route('chirps.store') }}">
@csrf
<div class="mb-3">
<label for="message" class="form-label">Write New Chirp</label>
<textarea
name="message"
placeholder="What's on your mind?"
class="form-control"
>{{ old('message') }}</textarea>
</div>
<x-input-error :messages="$errors->get('message')" class="mt-2" />
<x-hui-button type="submit" size="lg" svg="icons.mail" class="primary mt-2">Send Chirp</x-hui-button>
</form>
</div>
</div>
</div>
<div class="container chirp-stream">
<div class="row">
<div class="col-11 offset-1">
<h2 class="no-span">CHIRPS</h2>
</div>
</div>
</div>
<div class="container mt-3 pt-3">
@foreach ($chirps as $chirp)
<div class="row mt-3 pt-3">
<div class="col-3 col-sm-2">
<a class="text-decoration-none" href="#">
<img class="img-fluid" src="https://cdn3.iconfinder.com/data/icons/avatars-round-flat/33/avat-01-512.png" alt="profile image">
</a>
</div>
<div class="col-8 col-sm-9">
<h2 class="text-capitalize h5 mb-0">
<a class="text-decoration-none" href="#">{{ $chirp->user->name }}</a>
</h2>
<p class="text-info">
<span class="text-muted">commented on</span> {{ $chirp->created_at->format('j M Y, g:i a') }}
@unless ($chirp->created_at->eq($chirp->updated_at))
<small class="text-sm text-gray-600"> · edited</small>
@endunless
</p>
<div class="pt-2">
<div class="clearfix"></div>
<p>{{ $chirp->message }}</p>
</div>
</div>
<div class="col-1">
<!-- Chirp Actions -->
@if ($chirp->user->is(auth()->user()))
<a class="btn btn-primary dropdown-toggle"
id="navbarDropdown" data-bs-toggle="dropdown" href="#" role="button" aria-haspopup="true"
aria-expanded="false" v-pre>
<x-bxs-cog class='bx bx-sm' />
</a>
<div class="dropdown-menu dropdown-menu-end" aria-labelledby="navbarDropdown">
<a class="dropdown-item" href="{{ route('chirps.edit', $chirp) }}">
<x-bxs-message-square-edit class='bx' /> Edit
</a>
<form method="POST" action="{{ route('chirps.destroy', $chirp) }}">
@csrf
@method('delete')
<button type="submit" class="dropdown-item">
<x-bxs-message-square-x class='bx' /> Delete
</button>
</form>
</div>
@endif
</div>
</div>
@endforeach
</div>
@endsection
Now if you're paying close attention, you might notice that I have a fair number of icons being loaded in that template. Things like <x-bxs-message-square-edit class='bx' /> Edit. That is because I have also added the Blade Icon package pair with Boxicons.
4: SVG & Icons
The package that we recommend: blade-ui-kit/blade-icons: use SVG in Laravel will allow you to then add in any icon kit you want. If you want to use Boxicons, there is this package to make that happen: mallardduck/blade-boxicons: A package to easily make use of Boxicons in your Laravel Blade views.
In Summation
Well that wraps up a brief spin through getting started with Laravel 10 - 12 and Bootstrap 5. Hopefully some of the packages covered here help you out.
If you have any suggestions, or if there are any packages that you would absolutely recommend to a new project, please leave a comment below.


Comments
Add Comment
All Comments
// NO_COMMENTS_IN_BUFFER
Establish initialization protocol by creating the baseline entry trace.
System Moderation Interceptor is ON for this communication hub. All user transmission vectors must clear access protocol filtration approvals before broadcasting logs live to public network arrays.